Do you want IPv6 on your home or business network?
Are you having problems getting a working configuration through your provider?
Are you using an Apple Airport device for wireless?
If you answered ‘yes’ above then this post is for you!
This took me around 20 minutes to complete.
This kind of requires a public IP address on the WAN side of your Airport. I say kind of because I did not try to set this up in bridge mode.
3 steps:
You will need an account with Tunnelbroker (offered by Hurricane Electric). Go create your account!
You need to create a tunnel via their interface and you’ll need to know your public IP of your Airport device.
You’ll need to set up the Airport device (tested on Airport Time Capsule and Airport Extreme).
And follow along…
Once you have your account set up you’ll need to create the tunnel via the web interface. Click ‘create regular tunnel’ on the left side.
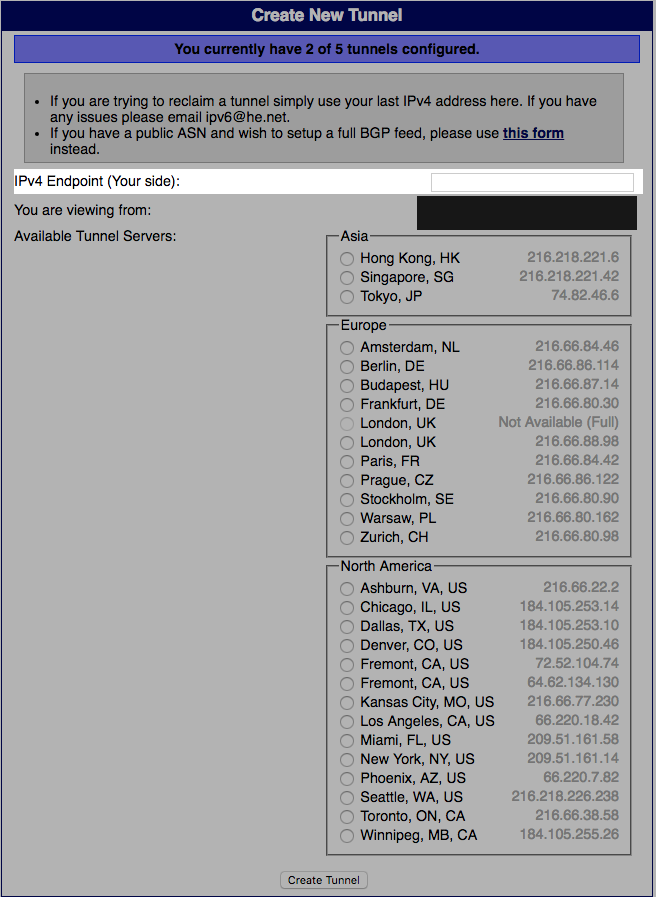
You’ll need to enter your public IPv4 IP address in the box indicated then choose your remote endpoint. You may want to do a few traceroutes ahead of time to find the site that is closest to you network-wise as physical locality doesn’t always equal closest point on the network. You’ll mainly want the lowest latency.
Your tunnel will look like the following screenshot:
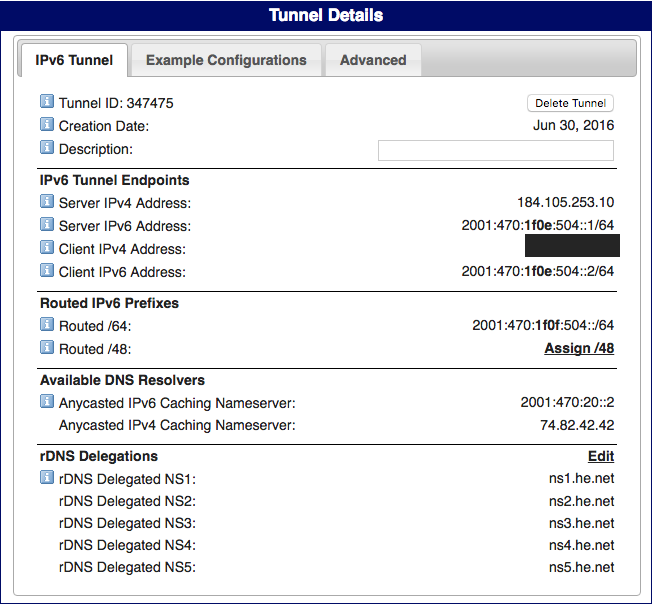
You’ll notice a link to assign an /48 – this is not needed and will make more sense in my next post where I build a tunnel from the Fortigate firewall in my lab and then delegate /56 and /64 networks further into my network.
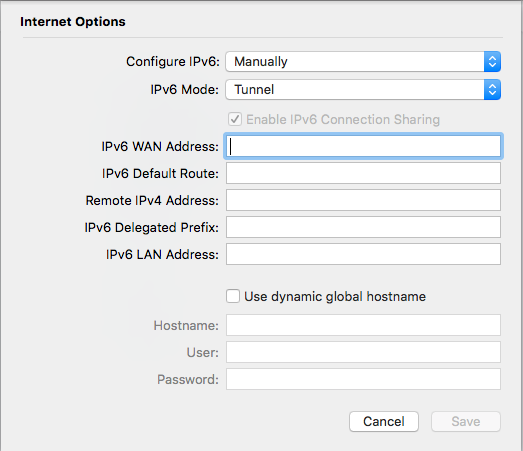
Last step is to configure the Airport device. Launch Airport Utility (Mac or Windows, I did not try this on iOS) and then select your device then click the ‘edit’ button. Select ‘Manually’ from the ‘Configure IPv6’ drop down and ‘Tunnel’ from the ‘IPv6 Mode’ drop down.
Click the Internet tab then select ‘Internet Options’ at the bottom, will look like:
Now we need to fill in those 5 boxes (I’ve included a textual summary table after screenshot)
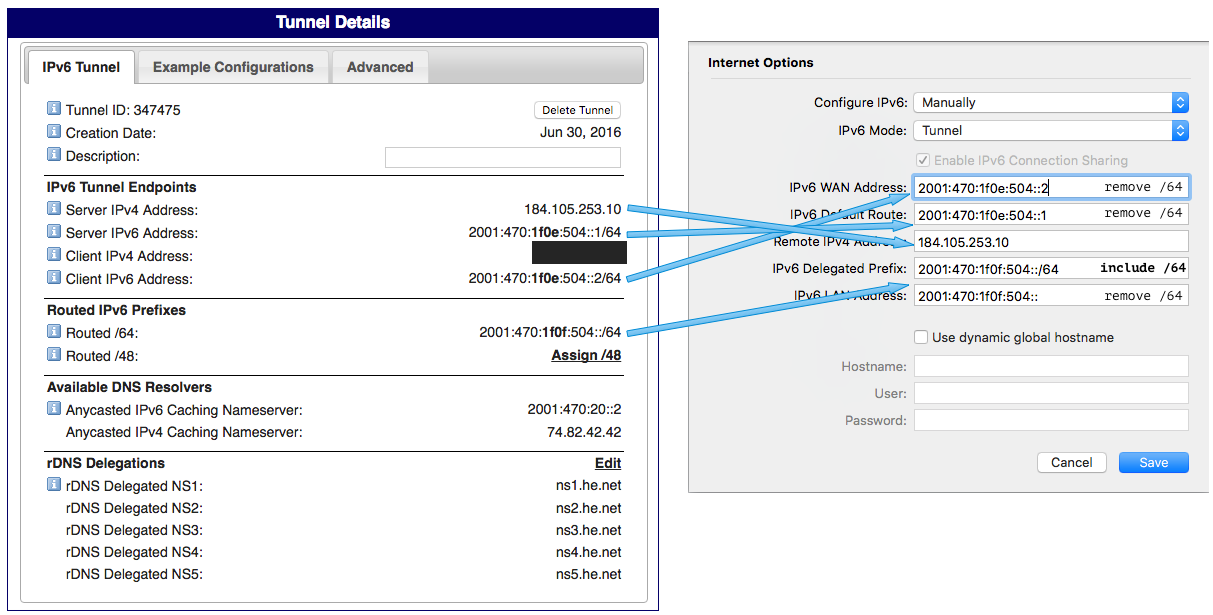
| Tunnel | Airport |
| Server IPv4 Address | Remote IPv4 Address |
| Server IPv6 Address | IPv6 Default Route (remove /64) |
| Client IPv6 Address | IPv6 WAN Address (remove /64) |
| Routed /64 | IPv6 Delegated Prefix (include /64) |
| Routed /64 | IPv6 LAN Address (remove /64) |
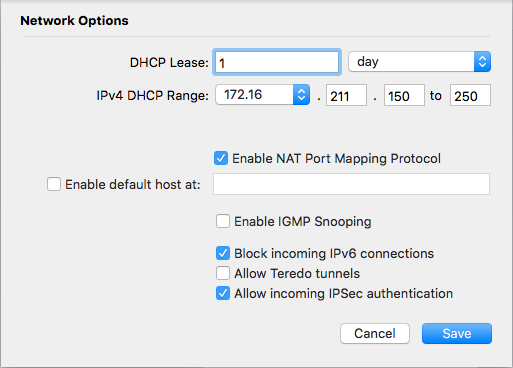
Lastly, and I really suggest you do this, you should block incoming IPv6 connections to your clients behind the Airport device. While configuring the Airport device click on the ‘Network’ tab, then click ‘Network Options’ at the bottom and click the ‘Block Incoming IPv6 connections’ toggle. If you do not do this then external IPv6 connections from the Internet can talk directly to your hosts behind your Airport device.
That’s it!
Want to learn more about IPv6?